Showing posts with label Industry. Show all posts

How To Install Android SDK for Windows, Mac and Linux: A Complete Guide & tutorial


Everything you need to get started with the Android SDK, and everything you need to know about installing it.


nstalling the Android SDK is far easier than it used to be, thanks to a new package from Google. One download gives you most everything you need to communicate with your phone via the USB port, using tools like adb and fastboot.

Let's begin.....

1. Getting started with the Android SDK

I told you this was pretty easy, and that there was just one file to download. Here it is. Download the SDK direct from Google by clicking here. Scroll down a bit and find the section marked "SDK Tools Only" and save it somewhere easy to get to, like your desktop. We'll be extracting it to a better location in the next step.
The file you downloaded is compressed. You'll need to be familiar with compressed files — and extracting them — to go any further. If you're not, stop here and spend the time to learn about them.
Extract your compressed file into the following location:
  • Windows: The root of your C: drive
  • OS X: Your home folder
  • Linux: Your home folder
Rename the extracted folder to "Android". This will make the rest of this guide, and your time with the SDK, much easier.

2. Prerequisites


You'll need a working version of Sun Java to run the SDK components. Advanced users may try alternatives like Open Java, but for this guide we're sticking with the official Sun Java from Oracle. Yes, that Oracle.

On a Mac, it's pretty easy because you'll already have it installed unless you uninstalled it. If you did, install it again — you should know how.

On Windows, head to the Oracle website and download the correct version (32- or 64-bit) for your computer. Again, if this gives you any trouble stop what you're doing and learn a bit more about your computer. If you can't install Java, maybe you're not yet ready to use the Android SDK.

On a Linux computer, you'll also need to install Sun Java from Oracle. You can find x86 and x64 binaries at the Java website. If you need more assistance, or want to use a package manager to install Java, you'll need to refer to the documentation for your particular distro.

Linux users will also have to make sure they have some 32-bit libraries installed if they are running a 64-bit version of the operating system. If you're using Ubuntu or an other Debian variant, install ncurses5 and stdc++6 through your terminal: sudo apt-get install lib32ncurses5 lib32stdc++6 
 
Packages for other distros, like SlackWare or Fedora should be available as well. See the documentation for your particular distro.

3. Setting your PATH


The PATH variable in your computer's operating system tells it where to look when you want to run a command from a terminal or the command line. For example, to run the adb command you either need to type and provide the complete path — ie the folder adb is actually in, inside the SDK folder — or have the location set in the PATH variable itself. It's a bit confusing, but the good news is that doing it is easier than explaining it.
For these directions to work, you will have to have extracted and renamed the SDK download folder as mentioned above, and to the correct location for this tutorial.

4. On Windows

You no longer can set the PATH in the autoexec.bat file or autoexec.nt file. You'll need to update the system Environment Variable settings instead. Here's how it's done on a Windows 8 machine:
  • Hit the Start key on your Keyboard.
  • Start typing the words Environment Variables.
  • As you type, you'll see the choice to Edit the system environment variables. Choose it.
  • In the Environment Variables window, select the PATH line item in the Systems Variables section, then click the Edit button.
Add the full path to the Android SDK tools and Android SDK platform-tools folders in the edit box, separated by a semi-colon. It should look something like this:
C:\Android\tools;C:\Android\platform-tools
For older versions of Windows, refer to the documentation that came with your computer for assistance on setting the PATH. And, again: If you've installed your sdk somewhere other than \Android, you'll need to adjust accordingly.

5. On OS X

You can set your PATH variable on a machine running OS X in your bash profile. Doing so is easy, and is all done in one file.
In your Home folder is a file named .bash_profile. Open it with any text editor.
You may see a blank file, or it may be full of other information. All we need to do is add a couple lines to the top of the file:
export PATH="$HOME/Android/tools:$PATH"
export PATH="$HOME/Android/platform-tools:$PATH"
(Did we mention that if your SDK is in another location, you'll need to adjust things accordingly? Good.)
Save the file, and reboot your computer so the new PATH is sourced properly.

6. On Linux

 
 Setting the PATH on a Linux computer is almost the same as on a Mac, you just edit a different file.
Using your favorite text editor, open the ~/.bashrc file. It will probably exist and have multiple entries. If you get an error that the file does not exist, simply create a new file and save it as ~/.bashrc when finished.

You'll want to add the following two lines to the END of the .bashrc file:

export PATH="$HOME/Android/tools:$PATH"
export PATH="$HOME/Android/platform-tools:$PATH"
 
Save the file, and reboot your computer so the new PATH is sourced properly.

7. Wrapping it up


If you made it this far, you have successfully installed the Android SDK and can now use tools like adb and fastboot. Pat yourself on the back and have a frosty beverage. We're going to talk a lot more about how to use these tools in future articles, as well as making sure your phone is ready to go and connected.


Your Android is your oyster, and you'll need no sword to open it.
Read More »

How To Install Windows On Your Apple Mac When All Other MethodsFails


What won’t work

During the course of my Windows install venture I figured out at least 6 ways which didn’t work. They all have their eureka moments, but don’t work out in the end.


1. Cleaning the superdrive

Apparently you can drape something like a lens cleaner over a thin business card, stick the thing into the slot and get to work on it. The business end of the drive is at the bottom so if you wiggle it just right, and you’re lucky, you could be successful in cleaning the thing. You can also try blowing some compressed air into it.

If you were successful in doing so you can basically skip this guide and install via Basecamp, well done!
 
2. Bootable USB via bootcamp

The only snag with this was that I didn’t have this option. Apparently this is only available for computers without an optical drive. There is a way in which you can enable this pretty easily though. This is something we will need to do further on as a part of our installation, but it still doesn’t work on its own.

When I saw the option, I promptly clicked on it and let Bootcamp create a startup USB for me. It worked at first, but then refused to even acknowledge it in the boot menu. I tried this with and without Bootcamp drivers and I even tried checking the "Install Windows" options which would automatically start the process for me.

I was a bit downcast but I thought: hey, let’s create a bootable USB in Windows! I found a Windows laptop and created an USB using Rufus. Of course, it didn’t work, it wasn’t seen by the boot manager. I went back and used the Windows 7 USB/DVD Download Tool which was made by Microsoft. Still nothing. Changed another pen drive. Nope. Sigh.

3. Firmware update

Good news, my iMac model has a firmware update, and what’s more, this update has to do with "booting" stuff (is luck finally on my side?). I downloaded and installed the firmware update and after a terrifying BIOS beep, everything was back to the good old not working ways.

Oh well, at least my firmware is updated.

4. rEFInd Boot Manager

After reading a whole lot of forums I saw that using rEFInd, an alternative boot loader may help.

Once installed and loaded on startup it "saw" the USB, however, while it was able to access the drive, I always receive a "No bootable disk found" message. This was weird since the message obviously came from the boot device, why is it looking for (maybe) a CD? Try as I may, rEFInd was not the answer, although just like Bootcamp, it is a part of the final solution.
 
5. Using an external drive

Nope. This was the second thing I tried but it didn’t even see the CD. Once I had rEFInd installed I tried again; the CD showed up in the boot manager, but it refused to boot from it. All I got was a horizontal cursor and nothing more. One thing I didn’t try was an Apple-made external drive but while it’s possible that (for some unknown reason) this would work, I have read that it doesn’t.

6. Virtual machines

I remember from using Parallels that it can use a Bootcamp partition, allowing me to use the bootable partition as a virtual machine. I had a feeling this wouldn’t work, but it was worth a shot. Parallels (and other virtualization apps) can’t install Windows as boot partitions. They can use them once created, but only if created separately.

Again, virtual machines will be a part of our solution, but not THE solution.
What does work

Technically, it is a specific series of operations that works. My source for it is Yes, This Big – a huge thank you to them for figuring out the final solution.

Here is the simplified rundown of the solution:

    Force Bootcamp to create a bootable disk
    Create a custom virtual machine with VMware (the trial version is sufficient)
    Modify the virtual machine and install Windows onto the Bootcamp partition
    Delete all the files and copy them, from the USB key
    Boot into the Bootcamp partition using rEFInd and Install Windows normally
    Curse Apple a little bit for making this so difficult

Let’s take a look at the specifics of all these steps, by the end of which you will have a nice little Windows install!
 
1. Force Bootcamp to create a bootable disk

If you don’t have this option enabled, you’ll need to edit some files.

You’ll need your computer’s (1) Boot ROM version and (2) Model Identifier which can be found in System Report. (Open up Spotlight, with Cmd + Space, and type "System Information".)

Here’s a sample of what you will see:


Head on over to the Applications/Utilities folder, right-click "Boot Camp Assistant.app" and choose "Show Package Contents".

Go into the "Contents" folder and make a copy of "info.plist" somewhere, just in case. Next, open the original "info.plist" file in a text editor, and search for "USBBootSupportedModels" – it should be somewhere at the bottom.

Look up your model identifier and add it as a string, something like this

   
<key>USBBootSupportedModels</key>
<array>
 <string>Your Model Identifier</string>
 <string>MacBook7,1</string>
 <string>MacBookAir3,2</string>
 <string>MacBookPro8,3</string>
 <string>MacPro5,1</string>
 <string>Macmini4,1</string>
</array>

Next, find the section labeled "DARequiredROMVersions" and add your Boot ROM Version in a similar fashion:

   
<key>DARequiredROMVersions</key>
<array>
 <string>Your Boot ROM Version</string>
 <string>IM41.0055.B08</string>
 <string>IM42.0071.B03</string>
 <string>IM51.0090.B03</string>
 <string>IM52.0090.B03</string>
 <string>IM61.0093.B01</string>
 <string>MP11.005C.B04</string>
 <string>MB11.0061.B03</string>
 <string>MBP11.0055.B08</string>
 <string>MBP12.0061.B03</string>
 <string>MM11.0055.B08</string>
</array>

You can now save and close this file.

Open Bootcamp and wonder at the appearance of the "Create a Windows 7 or later version install disk". Click all the checkboxes and let Bootcamp do its thing. You’ll need to supply it with an ISO image which you can generate with Rufus or the Windows 7 USB/DVD Download Tool.

Once Bootcamp is done, it won’t be able to install Windows. When it reboots, press the alt button until the boot manager comes up and boot back into OS X.

2. Create a custom virtual machine with VMware

Note: I’m pretty sure this can be done with other virtualization software as well but I don’t know enough about this topic to go rogue. The trial version of VMware is more than enough for this task so you can get it done free either way.

Before we jump in, we’ll need to take a look at the disk identifier of our Bootcamp partition.

Using Spotlight to type "Disk Utility", click on the BOOTCAMP partition and press CMD + i. This will bring up a disk info window where you can find the Disk Identifier – make a note of it


Open VMware fusion and press CMD + N to create a new virtual machine. You’ll need to click "More options…" and select "Create a custom virtual machine". Then click Continue.


Now, select the operating system you are installing, click Continue and select "Create a new virtual disk" from the next menu. Click Continue and select "Customize Settings" from the bottom of the next screen; this will let you specify the location for the virtual machine. I selected my desktop for easy access – you can safely delete it once this is all over anyway. Finish up and close VMware.

3. Modify the virtual machine and install Windows onto the Bootcamp partition

Now, we’ll use some trickery to make VMware use our Bootcamp partition as the target location for the install.

To edit the settings for the virtual machine you’ll need to open up a terminal. Once ready, type "cd " (add a space at the end) and drag the icon of your virtual machine into the terminal and press Enter.

Now you’ll need to issue a command which will link the VM to Bootcamp, take care to replace [X] and [Y] with the correct values.

1     /Applications/VMware\ Fusion.app/Contents/Library/vmware-rawdiskCreator create /dev/disk[X] [Y] win7_raw lsilogic

In the screenshot of my BOOTCAMP partition the disk identifier was disk0s4. The first number (0) would be X and the second (4) would be Y.

So in my case the command would be:
    
1    /Applications/VMware\ Fusion.app/Contents/Library/vmware-rawdiskCreator create /dev/disk0 4 win7_raw lsilogic

You won’t see any feedback from the terminal but if it worked, you should see a new file within the VM file.

Click on the icon for your virtual machine on the Desktop and click "Show Package Contents". This should result in a list of files – the new file you should be looking for
 "win7_raw.vmdk". 
 
The next step is to edit the "Windows 7 x64.vmx" file.

Open it in your text editor and search for the line starting with "scsi0.virtualDev" and edit its value to "lsilogic". Then search for "scsi0:0.fileName" and edit its value to "win7_raw.vmdk".


Open VMware and start the virtual machine. It will ask for your password because it needs to access the Bootcamp partition. You’ll need to install Windows from the iso file you created earlier. You may need to press CMD + A to open the settings and go to the CD/DVD section. Click Autodetect and choose the iso image and click enable.

Let the installer do its thing. You’ll need to format the Bootcamp partition using the drive tools because it won’t install on a FAT32 partition. Other than that, all should be well.
4. Delete all the files and copy them from the USB key

When the installation is complete, stop VMware and delete all files from Bootcamp.

OS X will still not be able to boot from the Bootcamp partition so we’ll delete everything we’ve done, and copy the files from our USB device (I’m not quite sure what’s happening here, I suspect that we are essentially using VMware to make the drive bootable, but we need a proper bootsector from our USB drive).

In any case, you may run into some problems while deleting because OS X may refuse to write the files on your NTFS drive. I used the Tuxera trial version to get this done (worked like a charm).

Now, copy all files from your USB key onto the Bootcamp partition.

5. Boot into the Bootcamp partition using rEFInd & install Windows normally

The last step is installing rEFInd. This is usually a simple matter of running a shell script, but with Yosemite, this has been complicated a bit.

Go to the download page and download the first option, the binary zip file and unzip it.

Open the terminal, type "cd ", drag the unzipped folder (it’s something like "refind-bin-0.8.3") into it and press enter. Type the following command:


1    sudo bash install.sh –esp

If you’re on Mavericks or earlier this should suffice, but if you’re on Yosemite, you’ll need to do some extra work. Yosemite users should go to "/Volumes/esp/EFI/refind/" and open the "refind.conf" file in their text editor. Find the line that has "dont_scan_volumes" in it. By default this line should be commented out, indicated by a hash sign at the beginning.

Uncomment the line and add two dummy values to it, mine looks like this:

1         dont_scan_volumes foo,bar

Once this has been done, reboot your Mac – it should use the new boot manager automatically. If it doesn’t reboot, hold down alt and select the "EFI Boot" option in the default boot manager.

Once in, select the Bootcamp partition and install Windows as usual. Once done it is a good idea to install the Bootcamp drivers. You can grab them from Apple and install them through your brand-spanking new Windows.

6. Curse Apple a little bit for making this so difficult

Seriously, Apple? There is no need for such complexity here.

First of all, if Macs do offer the opportunity of installing Windows in the first place, and the option to do it via a bootable USB that’s already built in, why hide this from some users just because they have a disk drive? Also, I’m pretty sure that the default boot manager not seeing boot devices is an artificial limitation, it has nothing to do with the Mac not supporting things.

But in any case, hopefully this article has helped some of you who were struggling with installing Windows on your Macs. I can finally play my Windows games from Steam which was kind of the goal of this whole enterprise in the first place!


Read More »

Toyota Hydrogen Buses 100% Fuel Cell Can Work As Emergency Generators

It's preparing a 100-strong fleet ahead of the 2020 Tokyo games.

Toyota will start selling fuel cell (FC) buses in 2017, with the aim of selling up to 100 in the Tokyo area ahead of the 2020 Olympic games. The company is using a beefed up version of the fuel system it developed for the Toyota Murai, with 10 high pressure tanks holding 600 liters of highly compressed H2. That gives it 235 kWh or power, about three times that of a Tesla Model S, meaning it "can be

used as a power source in the event of disasters," the company said in a press release.
Toyota has been working on CO2-free fuel-cell buses for a while now with its Hino bus and truck division. The company is bullish on hydrogen fuel cell vehicles, even though they're less efficient than EVs if the hydrogen is generated using water and electricity. Hydrogen made by reforming methane creates CO2 pollution, though less overall than if gasoline- or diesel-powered vehicles are used. That's assuming the methane, a potent greenhouse gas, doesn't leak -- and it often does.

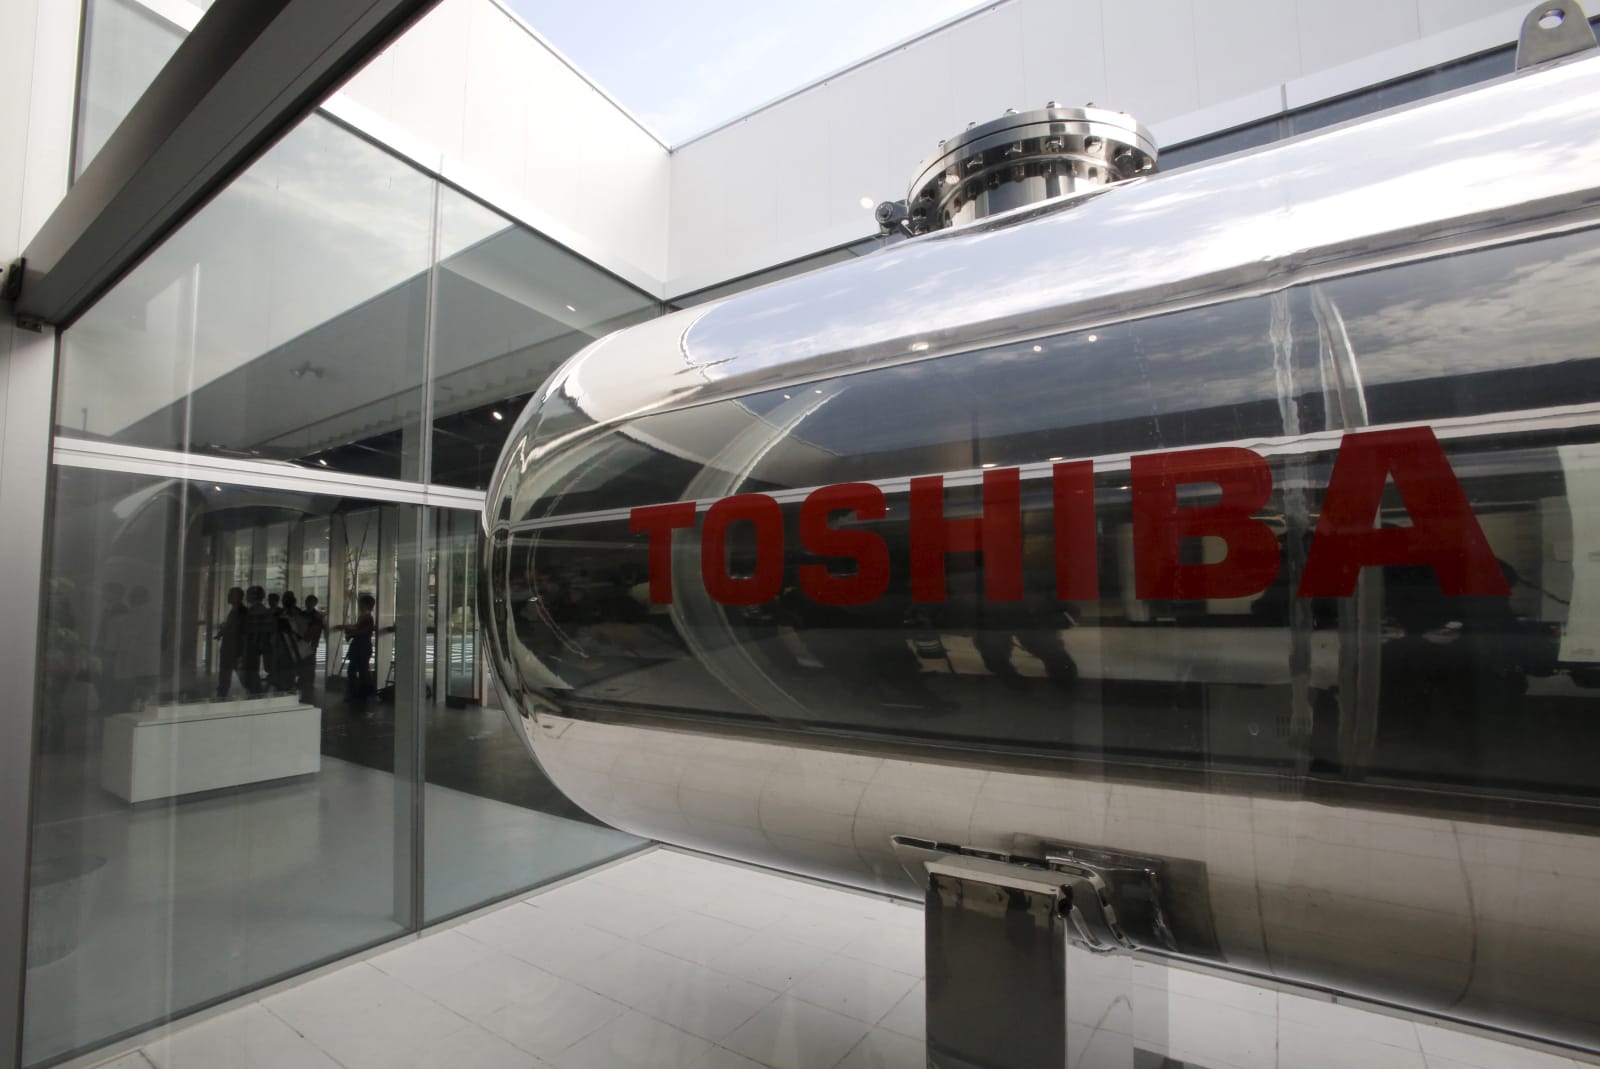
JAPAN-TOSHIBA/
Toru Hanai/Reuters
Toshiba recently unveiled Japan's largest water electrolysis hydrogen production plant (above) that uses power from the electrical grid. Unfortunately the nation still gets most of its electricity from fossil fuels, not renewable or nuclear energy. And the bulk of hydrogen is still produced by methane reforming, a polluting process made worse by the fact that Japan imports its methane.

However, the nation plans to produce more hydrogen by electrolysis over the next decade as part of Prime Minister Shinzo Abe's push to a hydrogen future. For more on fuel cells and hydrogen vehicles, check Engadget's explainer.


Source: Toyota


Read More »

Twitter, Spotify and Reddit, and a Huge Number of Other Big Website Reportedely Down This Morning

This Is Why Half the Internet Shut Down Today

Twitter, Spotify and Reddit, and a huge swath of other websites were down or screwed up this morning. This was happening as hackers unleashed a large distributed denial of service (DDoS) attack on the servers of Dyn, a major DNS host. It’s probably safe to assume that the two situations are related.

Update 4:22 PM EST: Looks like this is probably going to get even worse before it gets any better. Dyn says they are being hit with a third wave of attacks. Dyn told CNBC the attack is “well planned and executed, coming from tens of millions IP addresses at same time.”

Update 12:28 PM EST: Dyn says it is investigating yet another attack, causing the same massive outages experienced this morning. Based on emails from Gizmodo readers, this new wave of attacks seems to be affecting the West Coast of the United States and Europe. It’s so far unclear how the two attacks are related, but the outages are very similar.

In order to understand how one DDoS attack could take out so many websites, you have to understand how Domain Name Servers (DNS) work. Basically, they act as the Internet’s phone book and facilitate your request to go to a certain webpage and make sure you are taken to the right place. If the DNS provider that handles requests for Twitter is down, well, good luck getting to Twitter. Some websites are coming back for some users, but it doesn’t look like the problem is fully resolved.

Dyn posted this update on its website: “Starting at 11:10 UTC on October 21th-Friday 2016 we began monitoring and mitigating a DDoS attack against our Dyn Managed DNS infrastructure. Some customers may experience increased DNS query latency and delayed zone propagation during this time. Updates will be posted as information becomes available.”

Here’s a list of websites that readers have told us they are having trouble accessing:
  • ActBlue
  • Basecamp
  • Big cartel
  • Box
  • Business Insider
  • CNN
  • Cleveland.com
  • Etsy
  • Github
  • Grubhub
  • Guardian.co.uk
  • HBO Now
  • Iheart.com (iHeartRadio)
  • Imgur
  • Intercom
  • Intercom.com
  • Okta
  • PayPal
  • People.com
  • Pinterest
  • Playstation Network
  • Recode
  • Reddit
  • Seamless
  • Spotify
  • Squarespace Customer Sites
  • Starbucks rewards/gift cards
  • Storify.com
  • The Verge
  • Twillo
  • Twitter
  • Urbandictionary.com (lol)
  • Weebly
  • Wired.com
  • Wix Customer Sites
  • Yammer
  • Yelp
  • Zendesk.com
  • Zoho CRM
  • Credit Karma
  • Eventbrite
  • Netflix
  • NHL.com
  • Fox News
  • Disqus
  • Shopify
  • Soundcloud
  • Atom.io
  • Ancersty.com
  • ConstantContact
  • Indeed.com
  • New York Times
  • Weather.com
  • WSJ.com
  • time.com
  • xbox.com
  • dailynews.com
  • Wikia
  • donorschoose.org
  • Wufoo.com
  • Genonebiology.com
  • BBC
  • Elder Scrolls Online
  • Eve Online
  • PagerDuty
  • Kayak
  • youneedabudget.com
  • Speed Test
  • Freshbooks
  • Braintree
  • Blue Host
  • Qualtrics
  • SBNation
  • Salsify.com
  • Zillow.com
  • nimbleschedule.com
  • Vox.com
  • Livestream.com
  • IndieGoGo
  • Fortune
  • CNBC.com
  • FT.com
  • Survey Monkey
  • Paragon Game
  • Runescape


Here’s an internet outage map from DownDetector as of 12:46 PM EST:


Here’s an internet outage map from DownDetector as of 12:46 PM EST:


At the time of publication Dyn said that it was still dealing with the problem
.

Update 9:05 AM EST: Judging by emails from readers, this problem seems to be getting worse. 

 Update 9:43 AM EST: Dyn says the issue has been resolved.

Update 12:19 PM EST: Dyn says the issue is resolved, but multiple readers are messaging me to say they’re still having trouble accessing websites. 

Update 12:25pm EST: It’s happening again. (see above)


By: William Turton Staff Writer, Gizmodo  


Read More »

Tired Of Striking The Keyboard All The Time? Life Just Got Better With Microsoft Speech-To-Text Software That's As Good As a Professional Transcriptionist

Microsoft made speech-to-text software that's as good as a professional transcription          

                
Speech recognition software isn't perfect, but it is a little closer to human this week, as a Microsoft Artificial Intelligence and Research team reached a major milestone in speech-to-text development: The system reached a historically low word error rate of 5.9 percent, equal to the accuracy of a professional (human) transcriptionist. The system can discern words as clearly and accurately as two people having a conversation might understand one another.

By combining Microsoft’s open-source Computational Network Toolkit, and being a little bit over-obsessed with this project, the team was able to beat its goal of human parity by years in just months, according to Microsoft's blog. They hit the parity milestone around 3:30 a.m., when Xuedong Huang, the company’s chief speech scientist, woke up to the breakthrough.

This isn't a breakthrough that's only for AI wonks and researchers pulling all-nighters, however. It's a difference you'll likely notice when you're talking to an AI assistant in the near future says Huang, as speech recognition becomes a mainstream user interface. "The recognition accuracy is foundational to any successful user interaction." It's the difference between cursing at your phone's AI assistant when it mistakes "parity" for "parody" three times in a row, and being understood the first time, as if you're speaking to a real human.

It's highly accurate, but still imperfect, much like human transcriptionists might be. The biggest problem area where humans and the system disagree was in more nuanced signals, as the researchers note in their paper:
"We find that the artificial errors are substantially the same as human ones, with one large exception: confusions between backchannel words and hesitations. The distinction is that backchannel words like “uh-huh” are an acknowledgment of the speaker, also signaling that the speaker should keep talking, while hesitations like “uh” are used to indicate that the current speaker has more to say and wants to keep his or her turn. As turn-management devices, these two classes of words therefore have exactly opposite functions."

It could be argued that a lot of people have this problem, as well, but ideally our robots will be better active listeners than our fellow humans. The system also tripped up on the word “I," often omitting it completely, which could make a great plot of a dystopian sci-fi. Who does the system think "I" is?

Read More »

The Indian Government Set to Adopt 5G Technology

The Indian government seems set to adopt 5G technology alongside other developed markets, given its focus on programs like Digital India. The government has commissioned a research team on 5G technology, which has already filed 100 patents so far — of which around 10 have already been granted, according to the Economic Times.


The research project, which was commissioned by the ministry of electronics and IT, was approved in September 2015 with an outlay of Rs. 36.51crore over a period of three years. Most of these patents have been filed by the team simultaneously in the US and in India.

The Indian telecom market has historically been playing catchup game with the rest of the world in the adoption of 2G, 3G and 4G technologies. Although 5G standards are planned to be completed for first 5G commercial deployment in 2020, many operators in the US, Korea and Japan are preparing to pilot or trial 5G in 2016 and commercially launch the first 5G solutions from 2017 onwards.

5G is the fifth generation of wireless networks which are expected to offer not just more speed for end users and also have the capacity to connect the billions of devices like driver less cars and household appliances which will connect to the internet in the near future.

“We are scaling up fast and switching gears because 5G is just around the corner,” Kiran Kuchi, a professor at the department of electrical engineering at the Indian Institute of Technology (IIT), Hyderabad was quoted as saying.

He said that the research team expects to file a lot more patents in the next few years.
Apart from the government, private stakeholders like Reliance Jio, Tata Teleservices and Tejas Networks, along with a host of startups are partnering in the effort by lending their manpower and equipment. A person familiar with government’s plans said that India is aggressively pursuing the agenda at the body which is making standards for 5G of which India has been made a member only two years ago.


“World over governments in China, UK, and others are pumping money in 5G and we can’t miss the boat,” an official was quoted as saying.

An earlier ET report said that telecom gear makers Ericsson and Nokia began talks with Indian telcos and policy makers for possible engagements around fifth-generation (5G) technology. The initial talks revolve around the telcos’ interest and their preparedness for the 5G technology, besides identification of relevant spectrum band that will support the technology.


Read More »

Inside the New Razer’s Blade Laptop Computer

For better and awesome performance Razer packs a full mechanical keyboard into a laptop.
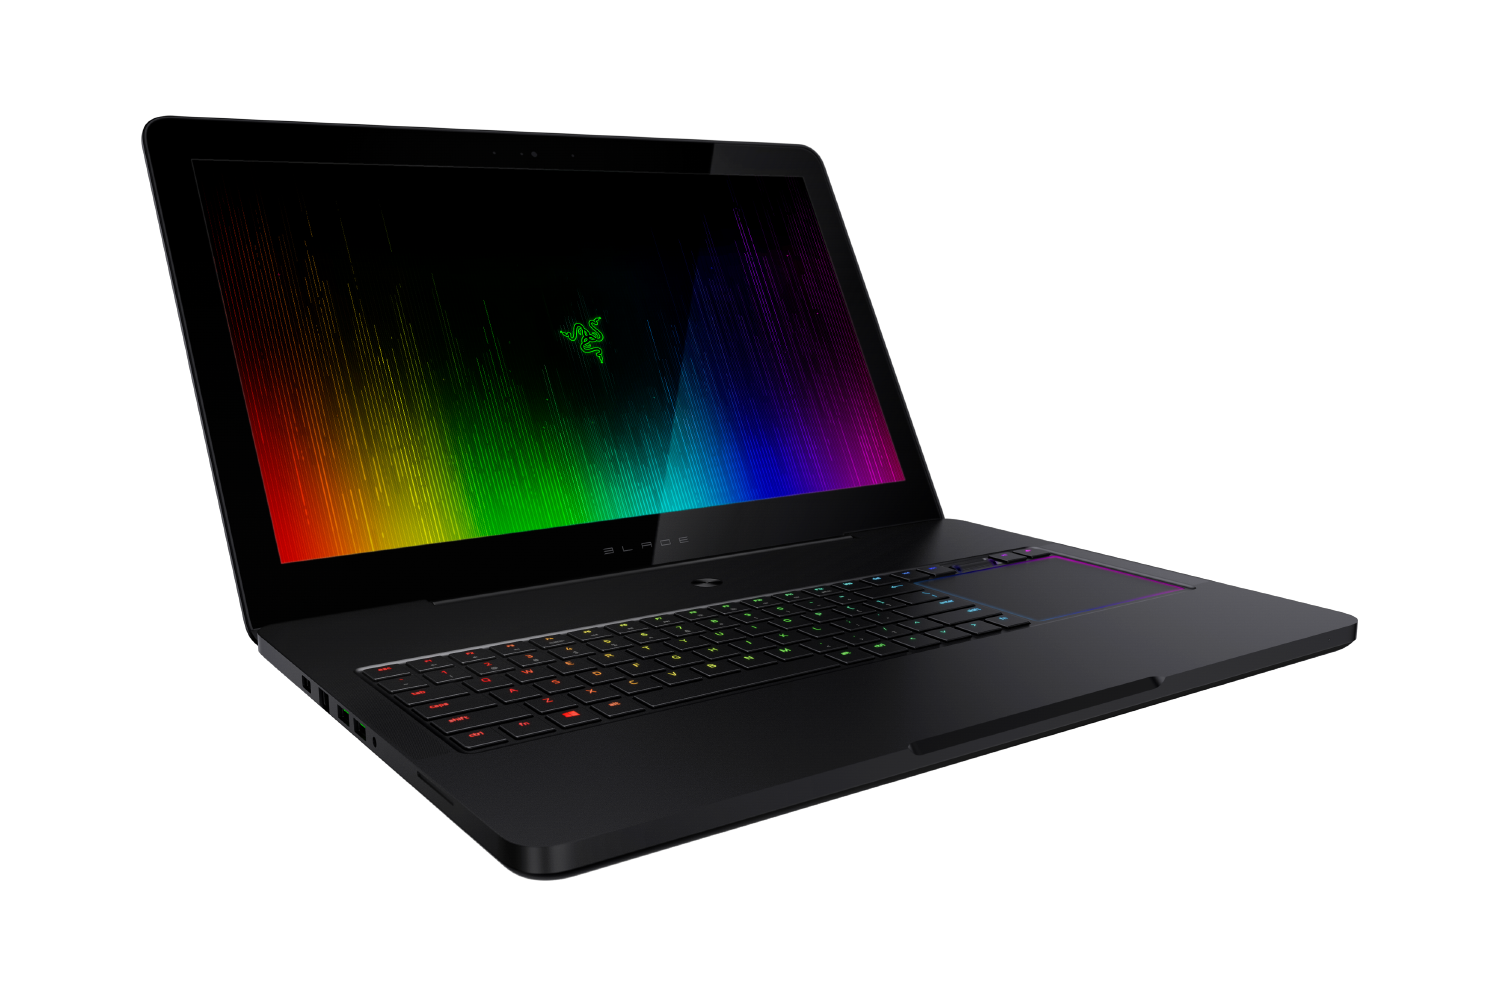
If you want hardcore gaming performance, but need it in a system that's portable, if not completely lightweight, then Razer's new Blade Pro could be just the ticket. Razer is calling it the "desktop in your laptop," and they the company has a point.

On the inside, the system packs a quad core Skylake processor, an 8GB Nvidia GeForce GTX 1080 GPU, 32GB RAM, up to 2TB of NVMe SSD storage in RAID 0, Thunderbolt 3, and a 4K G-Sync capable screen. That's a machine that isn't giving much up in performance to most desktop PCs, so already justifies Razer's strapline... but it's the next thing they did that really makes this a laptop desktop.
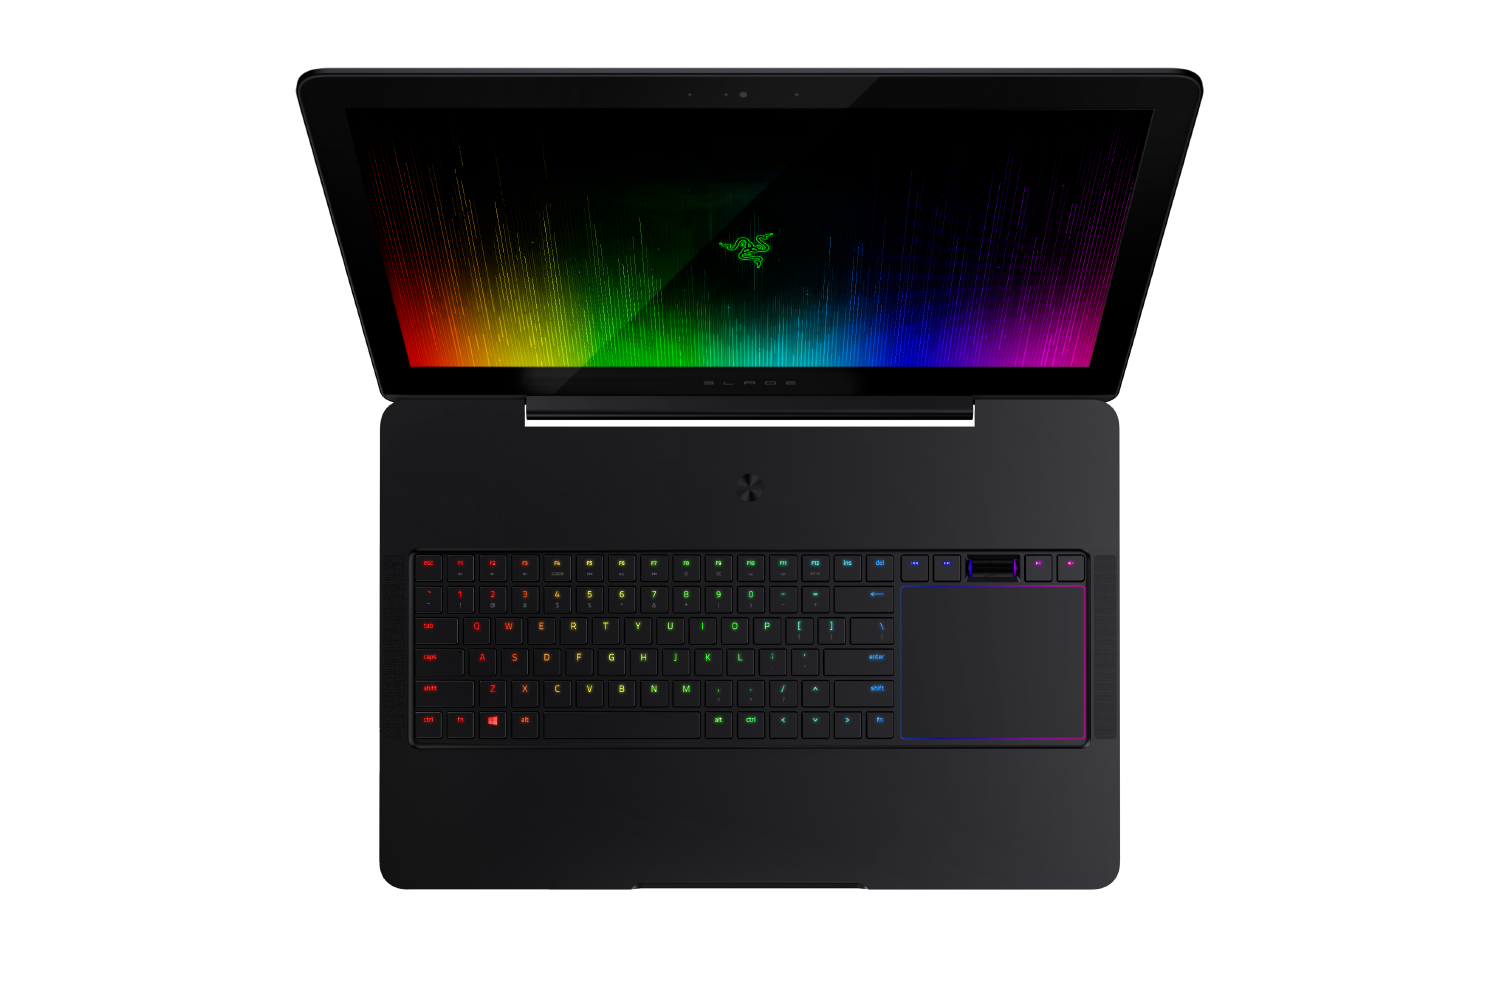
The Blade Pro doesn't have the usual membrane keys found in laptops. It has a full mechanical keyboard, with switches—not rubber domes—beneath each key. OK, it's still a laptop, so it's a low profile mechanical keyboard with reduced key travel and chiclet style buttons. But it's a mechanical keyboard nonetheless (Razer also has a similar mechanical mechanism for its iPad Pro keyboard). And of course, being a Razer laptop, it's not just a mechanical keyboard. It's a mechanical keyboard that can be lit up with any color of the rainbow. Alongside it sits a giant touchpad.
All this hardware is packed into a unit that's actually surprisingly portable. It weighs 7.8lbs, and is about 0.9 inches thick. I remember a time not so long ago when regular laptops were fatter (and heavier) than that. My current mechanical keyboard is more than an inch deep, and the closest it has to a powerhouse computer is a USB hub!.


There is of course the small matter of the price; it's a little eye-watering. With 512GB of storage, it starts at $3,699/€4,199/£3,499.

Listing image by Razer
Read More »

Instagram launches suicide prevention tool

Instagram is launching a new suicide prevention tool designed to reach out to users at risk of self-harm.

The new feature will allow people to anonymously flag posts about self-harm and suicide. Instagram will then notify the person who posted the flagged that someone thinks they may be going through a difficult time, and offer them help. 

They will be encouraged to either talk with a friend, contact a helpline, or get tips on where to seek help. 

"These tools are designed to let you know that you are surrounded by a community that cares about you, at a moment when you might most need that reminder," said Marne Levine, Instagram COO.
The flagged posts will be reviewed by a team of people who are working 24/7, and will not rely on algorithms to judge whether someone is vulnerable. 

Instagram already offers some help to people who are at risk of self-harm and suicide. It provides helpline contacts and other support information in its safety guidelines. 

But these are only useful if the person has already decided to seek the information. The new tool will allow Instagram and its users to proactively reach out to people who might be at risk. 

Samaritans, a leading charity helping people at risk of suicide, called the new tool useful. "Research shows that social media feeds can be effective indicators of what happens in real life...so messages that cause concern shouldn't be ignored," said Samaritans spokeswoman Susan Royal.

"This tool offers an opportunity for friends and Instagram to reach out to people who may be struggling and signpost them towards sources of support that they may not have otherwise considered, such as Samaritans," she added. 

The company said it collaborated with the National Suicide Prevention Line, the Samaritans, and with people who have personal experience with self-injury and suicidal thoughts to build the tool. 

"We listen to mental health experts when they tell us that outreach from a loved one can make a real difference for those who may be in distress," Levine said. "At the same time, we understand friends and family often want to offer support but don't know how best to reach out," she added. 

Instagram's parent company, Facebook (FB, Tech30), has introduced similar tools that allow users to report content about suicide or self-injury. 

Facebook can then reach out to the user posting this content and offer help and information. 


Read More »

Apple Watch Nike+ Soon To Hit The Market

Apple will debut a Nike-branded Apple Watch next Friday in a bid to highlight the device’s fitness creds.

Apple Watch Nike+


Apple is mostly making a fashion and branding statement with Apple Watch Nike+ via a special band and color schemes. The core features of the special version of the watch are the same as other Series 2 models, including a built-in GPS to track your pace, distance, and route.

But independent GPS tracking is a critical fitness upgrade for a product co-branded with Nike, because it gives you the option to untether your iPhone when exercising. That is not possible on the first-gen watch, which needs the iPhone’s GPS.

Apple also needs to do this to match the competition. Fitbit, the wearables’ market leader, offers the Fitbit Surge with built-in GPS at a price considerably lower than the Apple Watch Series 2. Though the Surge is not a full-featured watch like Apple’s, it starts at $250, compared to the Nike version of the Apple Watch 2 that has a starting price of $369.

Basic wearables, like most of FitBit’s offerings, are still “a clear value proposition for end-users,” Ramon Llamas, an analyst at IDC, said in a statement when the company announced second-quarter global wearable shipment tallies last month.  
 
That said, the Apple Watch Nike+, via its exclusive watch faces, can typically show off more metrics on the same screen -- including distance, duration, heart rate, and pace -- than a basic Fitbit wearable. 
 
Features exclusive to the Apple Watch Nike+

There are nice-to-have add-ons you get with Apple Watch Nike+. First and foremost is the band, which is probably its signature feature. Apple calls it light, flexible, and breathable, with perforations that reduce weight and boost ventilation. And the Nike Volt lime color scheme (what Nike calls “bright green-yellow”) matches the groundbreaking Nike FuelBand.

The Nike+ version also comes with an exclusive Nike watch face, which adds the iconic Volt color in digital and analog styles.

In the app department, there’s Nike+ Run Club. While you’re tracking your runs, you can get coaching and workouts created by Nike “master trainers.” And, like other Watch models, you can connect with friends for encouragement. For example, you can receive reminders triggered by your friends’ shared activity and share run results on leaderboards.

Like all Watch 2 models, the Nike+ version can be used for shallow-water activities like swimming in a pool or ocean. The Apple Watch Series 2 has a water resistance rating of up to 50 meters under water, but it is not recommended for scuba diving or waterskiing, or other activities involving “high-velocity” water.

And, like all Watch 2 models, it packs a faster processor (dual processing cores) and brighter display than the first-generation Watch.

The Apple Watch Nike+ also comes in Space Gray Aluminum Case with Black/Cool Gray Nike Sport Band and a Silver Aluminum Case with Flat Silver/White or Flat Silver/Volt Nike Sport Band.


Read More »

TravelBank launches expense account app that pays you for underspending


 Employees waste tons of money through expense accounts because there’s no incentive to book flights early, stay at a modest hotel, or dine on the cheap. But a new startup called TravelBank can predict what employees should be spending on trips, help them file their expenses, and even give them cash rewards if they come in under budget.

TravelBank has raised a $10 million Series A round led by NEA and joined by Accel, and today is launching on iOSAndroid, and web. It was co-founded by Duke Chung, who previously started and sold customer service startup Parature to Microsoft for $100 million.

“The way I look at entrepreneurship is that I like the categories that every company must have” says Chung. “And every company needs an expense product. It’s a basic function, and there’s huge opportunities to create something better.”
It’s not perceived as a sexy category
— -Duke Chung, TravelBank CEO
TravelBank is targeting small to medium businesses that are too tiny for its SAP-owned competitor Concur, which is designed for Fortune 5000 companies. TravelBank will be free to use at first, and though it plans to monetize it doesn’t have definitive plans for how. Eventually, it could charge per-seat or a percentage of savings.

“Expense management has been a very sleepy space. Maybe because it’s boring it doesn’t attract a lot of talent or innovation. It’s not perceived as a sexy category so there’s only a few competitors. I view that as an opportunity” Chung tells TechCrunch.

TravelBank will be spending much of the $10 million it raised a few months ago on marketing and sales for its newly launched apps. But it benefits from the bottom-up distribution process popularized by Dropbox, and the fact that it’s starting free.

Any employee can sign up and use TravelBank to submit expenses and process their reimbursements by simply taking photos and uploading them with the app. It integrates with popular “general ledger” business software like QuickBooks, NetSuite, or Bill.com. TravelBank can export expenses as PDFs for easy backwards-compatibility with some legacy expense systems.

If users convince the rest of their company to get on TravelBank, their employers can activate the rewards feature that estimates what employees should pay for flights, car rentals, hotels, and meals based on real-time price analysis. If employees are frugal, they can get a portion of that unburnt cash as a thank you for saving their employer money.

$1.2 trillion is spent on travel and entertainment globally, making it the second-biggest controllable spending item for companies behind payroll. Chung himself got fed up watching employees at Parature overspend.


“We found that people increasingly become more excessive when it came to business spending” Chung tells me. “When we knew all the employees and they knew us, they were more frugal, with the startup mentality. But as a company grows and you don’t get to know all the employees as well, you see some breakage and it gets worse of over time with abuse and excessive spending. There was no way to regulate that”, so Chung says he was inspired to build TravelBank to enhance management visibility.

Sometimes spending the big bucks to wine and dine a client can be a smart strategy. That’s why TravelBank lets you exempt spending on clients from your budget, which focuses on the per diem and travel expenditures employees need to get by.

Surprisingly, Chung says TravelBank actually makes employees more efficient. Instead of flying to New York to have a single dinner meeting, employees end up booking breakfast, lunch, and dinner meetings with clients. That way they can exclude those costs, come in further under budget, and get a bigger reward while also squeezing more value out of their trip.

TravelBank will have to convince small businesses to ditch spreadsheets, emails, and haphazard receipt photos for a standardized app. That will undoubtedly be tough. But if it can address an omnipresent business problem neglected by other enterprise developers, it could help companies apply their capital to what matters while turning employees from selfish spenders into thrifty team members.

 
Read More »

European Space Agency’s Schiaparelli ExoMars Landing Did Not Go as Planned


The European Space Agency’s Schiaparelli lander did not touch down on Mars as planned yesterday. During a press briefing this morning, ExoMars mission scientists confirmed that the lander’s signal cut out about 50 seconds before landing, and that something went wrong in the final steps, right around when the parachute was jettisoned. ESA is still analyzing data collected by satellites and telescopes to get the full story.

ExoMars, an ESA and Roscosmos-led mission to search for signs of geologic and biological activity on the Red Planet, arrived at Mars yesterday after a seven-month journey. The mission’s scientific workhorse, the Trace Gas Orbiter, performed its orbital insertion maneuver beautifully, becoming the second ESA satellite to circle the Red Planet. 

The Schiaparelli Entry, Descent, and Landing Module (also called the EDM) did not fare so well. Its task yesterday was to arrive at the surface in one piece, by performing an automated landing sequence that included ballistic entry, heat shield release, parachute deployment, and finally, a 30 second firing of its retro-thrusters shortly before touchdown. 

Prior to entering the Martian atmosphere, the Giant Metrewave Radio Telescope (GMRT) in India began receiving a signal from Schiaparelli, but as ESA told us yesterday, that signal was lost “some time prior to landing.” A small fleet of Mars-orbiting satellites, including ESA’s Mars Express, NASA’s MAVEN probe and Mars Reconnaissance Orbiter, and the newly-arrived TGO, have been mobilized to search for the lander.

Telemetry data collected by TGO and downlinked this morning will be key to getting the full story on Schiaparelli, which seems to have successfully entered the Martian atmosphere, released its heat shield, deployed its parachute, and decelerated from 13,000 mph (21,000 kph) to 155 mph (250 kph).

About a kilometer above the surface, when the parachute and back heat shield were set to release and retro-thrusters should have started firing, the lander ran into trouble. “This ejection itself appears to have occurred earlier than expected, but analysis is not yet complete,” ESA said in a statement. What’s more, it appears the thrusters fired for just a few seconds, instead of the intended 30. About 50 seconds before landing, Schiaparelli’s transmission went dead.

As disappointing as it is to hear that the landing didn’t go off perfectly, it’s worth emphasizing that Schiaparelli was ESA’s dry run. The entire purpose of the lander was to demonstrate technology that will be used to bring a larger, mobile rover to the surface of Mars in 2020—and that demonstration included rooting out any design or operational flaws. 

Once ESA figures out exactly what went wrong, it’ll get to work making sure the same mistakes aren’t repeated. In the meanwhile, we now have another scientific orbiter around Mars.


Read More »

All Tesla cars built from today on have all hardware needed for full self-driving


 Elon Musk revealed the Model 3 in March, revealing details of the $35,000 base model including a sub-six second 0-60 time and a minimum 215 mile range. The basic picture of the Model 3 inspired a pre-order frenzy unlike anything seen previously in the car world, but now Musk has dropped what he referred to earlier as Part 2 of the Model 3 unveiling after a lengthy pause, as promised, and it’s a doozy.

Musk announced that all Tesla cars being produced as of today, including the Model 3, will have everything they need onboard to achieve full Level 5 self-driving in the future. The news means that every Tesla vehicle, including the Model S and X as well as Model 3 cars made after today will eventually be able to achieve full autonomous driving, with what Tesla refers to as “a safety level substantially greater than that of a human driver” via nothing more than a software update at some point in the future.

The hardware required to make this possible includes a sensor loadout complete with eight surround optical cameras, which can see up to 250 meters out from the vehicle on all sides, and a dozen ultrasonic sensors to assist the optical system. These are capable of twice the range of previous hardware, and can detect both “hard and soft objects” according to the company. Also included is the radar hardware that provides forward-facing detection of hazards even through potentially obfuscating conditions.

The biggest change might be the new onboard computer that provides over 40 times the processing power of the existing Tesla hardware, which actually runs the in-house neural net the car maker has developed in order to handle processing of data inbound from the vision, sonar and radar systems. Musk said on call discussing the most recent update to the existing driver assistance Autopilot software that it basically stretched computing power to the limit, which is why the upgraded CPU is required for full Level 5 autonomy. The new GPU is the Nvidia Titan, Musk said on the call, though it was a “tight call” between Nvidia and AMD.

The validation required for full autonomy will still take some more time, but Musk said on a call that it’s actually already looking like it’ll be at least two times as safe as human driving based on existing testing.

While it’s being developed, the self-driving system will operate in the background in “shadow mode,” essentially working virtually behind the scenes in order to demonstrate where it would’ve been able to avoid accidents that a person driving could not.

While the hardware will be included in all Tesla cars made from now on, which includes the Model 3, it will be an $8,000 add-on for vehicles to enable the software.

The reason for building in full autonomy capability across the lineup, according to Musk, is entirely to increase driving safety and reduce traffic-related accidents. Musk spoke passionately about this aim going so far as to admonish broad media coverage of Autopilot-related accidents, while the ongoing and persistent issue of human-fault car deaths receives far less attention from press.

In fact, the National Highway Traffic Safety Administration reported sharp increases in traffic deaths in both 2015 and 2016, and asked for help parsing the data to determine the causes of the rise. And when the Department of Transportation released its federal guidelines for autonomous driving technology, it also strongly indicated that the government believes autonomy in vehicles will ultimately lead to safer roads.

Musk said in a conference call in August regarding Tesla’s advancements in creating a car with Level 4 autonomous capability that “what we’ve got will blow people’s minds, it blows my mind,” and added that “it’ll come sooner than people think.” He’s certainly delivered with today’s announcement.


Read More »

Nintendo's Latest Gaming Revolution is Nintendo Switch For the Living Room and Beyond


 The first thing to know about the new Nintendo Switch home gaming system: it’s really fun to play. With great graphics, loads of game titles and incredible performance, the Nintendo Switch will provide people with many hours of engaging and interactive gaming entertainment.
\
But creating a device so fun required some serious engineering. The development encompassed 500 man-years of effort across every facet of creating a new gaming platform: algorithms, computer architecture, system design, system software, APIs, game engines and peripherals. They all had to be rethought and redesigned for Nintendo to deliver the best experience for gamers, whether they’re in the living room or on the move.

A Console Architecture for the Living Room and Beyond

Nintendo Switch is powered by the performance of the custom Tegra processor. The high-efficiency scalable processor includes an NVIDIA GPU based on the same architecture as the world’s top-performing GeForce gaming graphics cards.

The Nintendo Switch’s gaming experience is also supported by fully custom software, including a revamped physics engine, new libraries, advanced game tools and libraries. NVIDIA additionally created new gaming APIs to fully harness this performance. The newest API, NVN, was built specifically to bring lightweight, fast gaming to the masses.

Gameplay is further enhanced by hardware-accelerated video playback and custom software for audio effects and rendering.

We’ve optimized the full suite of hardware and software for gaming and mobile use cases. This includes custom operating system integration with the GPU to increase both performance and efficiency.


NVIDIA gaming technology is integrated into all aspects of the new Nintendo Switch home gaming system, which promises to deliver a great experience to gamers.

The Nintendo Switch will be available in March 2017. More information is available at  


Nintendo Switch is a trademark of Nintendo.


Read More »