How to Enable Sideloading On Your BlackBerry Priv And Other Android Phones

All Android phones are set so that only applications from Google Play can be downloaded and installed.  


It's a safety thing, and keeps you from installing those malicious applications you keep hearing about but don't know anyone who was ever affected by them. We think that most users should leave things at the default and enjoy the over one million apps in Google Play, but there is one very good reason to change this setting — the Amazon Appstore.

If the BlackBerry Priv is your first Android phone and you're coming from the BlackBerry ecosystem, there's a good chance you have quite a bit of content in the Amazon Appstore. You don't have to lose any of it!
  • Open the device settings on your Priv
  • Scroll down until you see the entry labeled Security, then tap on it
  • Scroll down and you'll see an entry for "Unknown sources"
  • Tap the slider switch and enable them
You'll get a pop-up window warning you that your phone and personal data are more at risk because you enabled this setting. That's true — you can now install any Android application from any source. Changing the setting can also put you at risk whenever any exploit tries to auto-install an application. But you'll need to enable unknown sources if you want to use apps you didn;t download and install from Google Play.

Note:   Just be careful. Never download any file where you don't know or trust the source.

Read More »

How To Install Android SDK for Windows, Mac and Linux: A Complete Guide & tutorial


Everything you need to get started with the Android SDK, and everything you need to know about installing it.


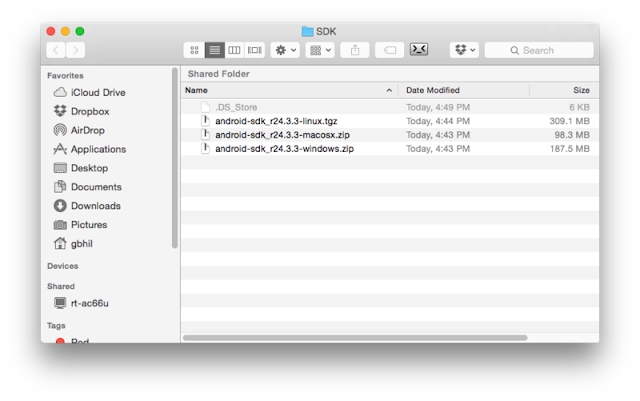
nstalling the Android SDK is far easier than it used to be, thanks to a new package from Google. One download gives you most everything you need to communicate with your phone via the USB port, using tools like adb and fastboot.

Let's begin.....

1. Getting started with the Android SDK

I told you this was pretty easy, and that there was just one file to download. Here it is. Download the SDK direct from Google by clicking here. Scroll down a bit and find the section marked "SDK Tools Only" and save it somewhere easy to get to, like your desktop. We'll be extracting it to a better location in the next step.
The file you downloaded is compressed. You'll need to be familiar with compressed files — and extracting them — to go any further. If you're not, stop here and spend the time to learn about them.
Extract your compressed file into the following location:
  • Windows: The root of your C: drive
  • OS X: Your home folder
  • Linux: Your home folder
Rename the extracted folder to "Android". This will make the rest of this guide, and your time with the SDK, much easier.

2. Prerequisites


You'll need a working version of Sun Java to run the SDK components. Advanced users may try alternatives like Open Java, but for this guide we're sticking with the official Sun Java from Oracle. Yes, that Oracle.

On a Mac, it's pretty easy because you'll already have it installed unless you uninstalled it. If you did, install it again — you should know how.

On Windows, head to the Oracle website and download the correct version (32- or 64-bit) for your computer. Again, if this gives you any trouble stop what you're doing and learn a bit more about your computer. If you can't install Java, maybe you're not yet ready to use the Android SDK.

On a Linux computer, you'll also need to install Sun Java from Oracle. You can find x86 and x64 binaries at the Java website. If you need more assistance, or want to use a package manager to install Java, you'll need to refer to the documentation for your particular distro.

Linux users will also have to make sure they have some 32-bit libraries installed if they are running a 64-bit version of the operating system. If you're using Ubuntu or an other Debian variant, install ncurses5 and stdc++6 through your terminal: sudo apt-get install lib32ncurses5 lib32stdc++6 
 
Packages for other distros, like SlackWare or Fedora should be available as well. See the documentation for your particular distro.

3. Setting your PATH


The PATH variable in your computer's operating system tells it where to look when you want to run a command from a terminal or the command line. For example, to run the adb command you either need to type and provide the complete path — ie the folder adb is actually in, inside the SDK folder — or have the location set in the PATH variable itself. It's a bit confusing, but the good news is that doing it is easier than explaining it.
For these directions to work, you will have to have extracted and renamed the SDK download folder as mentioned above, and to the correct location for this tutorial.

4. On Windows

You no longer can set the PATH in the autoexec.bat file or autoexec.nt file. You'll need to update the system Environment Variable settings instead. Here's how it's done on a Windows 8 machine:
  • Hit the Start key on your Keyboard.
  • Start typing the words Environment Variables.
  • As you type, you'll see the choice to Edit the system environment variables. Choose it.
  • In the Environment Variables window, select the PATH line item in the Systems Variables section, then click the Edit button.
Add the full path to the Android SDK tools and Android SDK platform-tools folders in the edit box, separated by a semi-colon. It should look something like this:
C:\Android\tools;C:\Android\platform-tools
For older versions of Windows, refer to the documentation that came with your computer for assistance on setting the PATH. And, again: If you've installed your sdk somewhere other than \Android, you'll need to adjust accordingly.

5. On OS X

You can set your PATH variable on a machine running OS X in your bash profile. Doing so is easy, and is all done in one file.
In your Home folder is a file named .bash_profile. Open it with any text editor.
You may see a blank file, or it may be full of other information. All we need to do is add a couple lines to the top of the file:
export PATH="$HOME/Android/tools:$PATH"
export PATH="$HOME/Android/platform-tools:$PATH"
(Did we mention that if your SDK is in another location, you'll need to adjust things accordingly? Good.)
Save the file, and reboot your computer so the new PATH is sourced properly.

6. On Linux

 
 Setting the PATH on a Linux computer is almost the same as on a Mac, you just edit a different file.
Using your favorite text editor, open the ~/.bashrc file. It will probably exist and have multiple entries. If you get an error that the file does not exist, simply create a new file and save it as ~/.bashrc when finished.

You'll want to add the following two lines to the END of the .bashrc file:

export PATH="$HOME/Android/tools:$PATH"
export PATH="$HOME/Android/platform-tools:$PATH"
 
Save the file, and reboot your computer so the new PATH is sourced properly.

7. Wrapping it up


If you made it this far, you have successfully installed the Android SDK and can now use tools like adb and fastboot. Pat yourself on the back and have a frosty beverage. We're going to talk a lot more about how to use these tools in future articles, as well as making sure your phone is ready to go and connected.


Your Android is your oyster, and you'll need no sword to open it.
Read More »

How to unlock the "Nexus" 6P or Nexus 5X bootloader

 Bootloader freedom

Your new Nexus 6P or Nexus 5X comes from the factory with a locked bootloader. While unlocking it is trivial, it's important to remember that an unlocked bootloader is very unsecure, and makes your personal data more vulnerable should someone get your phone in their hands. If you're not the type of person who wants to flash ROMs or system images or the like, it's probably best to leave it locked. That's for you to decide.

Should you decide to unlock your bootloader, remember that doing so will erase all the user data on your phone and return it to the out-of-box state. Still with us? Cool. Here's how to do it.

You'll need a working installation of fastboot on your computer. Yes, you need a computer to unlock the bootloader. We recommend that you install the Android SDK and the official Google USB driver if you're using Windows, but there are toolkits and bundles available if you'd rather go that way. We're going to go with the premise that you've downloaded and installed the Android SDK for your computing platform, and any needed drivers for Windows computers.

Next, you'll need a suitable cable. In this case, suitable means one end needs to be USB Type-A to plug into your computer, and the other needs to be USB Type-C to plug into your phone. For the Nexus 6P and 5X, we recommend you use the one that came in the box.


Now you need to give permission for the bootloader to be unlocked. And to make things easy, enable USB debugging on your phone. Go to settings, About phone and find the entry labeled build number. Tap it five times, read the pop up telling you that you're a developer now, then go back to the main settings page. Near the bottom, you'll see a new entry labeled Developer options. Tap it to get in there, and toggle the switch to allow OEM unlocking, then enable USB debugging.


Now connect all the things together, and fire up the command line on your Windows computer or a terminal program on your Mac or Linux computer. Make sure your phone is unlocked and the screen is on, because you'll be asked to authorize the computer and give it permissions to communicate with your Nexus 6P over a wire. Once that's done and sorted, it's time to do some typing.


On your computer, at the command prompt type: adb devic
 
If everything is good, you'll see the phone's serial number in your command line window. If not, you probably have a PATH issue. See the tutorial about setting up the SDK for help if you're using a full SDK installation, or ask in the developers support thread if you're using some sort of toolkit. As a workaround, you can navigate to the folder with the adb and fastboot executable files and work from there. If you do this on a Mac or Linux computer, remember your dot and slash: "./adb devices" for example.


Once you have things sorted, it's time to reboot to the bootloader: adb reboot-bootloader
 
When you get to this stage, you will need to use fastboot to communicate instead of adb. If you're working out of the folder where the fastboot command is located, remember that dot and slash if you're using a Mac or Linux computer. Try this command to see if everything is working: fastboot devices
 
See the serial number like we did with the adb command? If so, you're good to go. If not, you need to troubleshoot. If you're using Windows and having issues, chances are it's the driver. In any case, hit the forums and work out why things aren't communicating if you need to.

fastboot devices

Up until now, things are the same here as they have always been with Nexus phones. But the command to actually unlock the bootloader has changed. When you're ready, at your command line,  type: fastboot flashing unlock
 
Remember — this will erase everything on your phone and restore it to the way it came out of the box.


You'll need to confirm this action on your phone's screen, using the volume and power keys. Follow the instructions on your screen.


Let it do it's thing, and when it's done send one more command to make things final: fastboot reboot
 
After recovery erases everything and you've booted back to Android (at the device setup screen) you can unplug your cable and use your phone normally.


If you ever decide to relock your bootloader, you can do so with this command: fastboot flashing lock

  
Remember, if you need to unlock your bootloader again, things will get erased again.

That's it. Your bootloader is now unlocked, and you can flash both official and unofficial firmware to your Nexus. In fact, you'll be reminded that your bootloader unlocked each and every time you start your phone. Stay safe, and choose wisely!


Read More »

Complete Easy Step By Step Guide On How To Root All Android Mobile Phones (Lg, Samsung, Infinix, Htc and the likes.)

Everything you need to know about rooting your Android Mobile Phones

While your Android isn't in the same sort of jail an iPhone lives in, rooting can help you break out.
If you've researched anything about Android on the internet, you've probably seen and read about "rooting" one. There was a time when many of the Android phones available didn't live up to their potential, and root was the answer. Horrible software was the norm, applications that you would never use ran amok and wasted data and battery life, and the experience was bad all around.

Because every Android phone is running the Linux kernel and middleware very similar to a Linux distribution you would install on a computer under the hood, rooting them was the way to allow us to try and fix them our own way. Rooting is how you get complete access to everything in the operating system, and those permissions allow you to change it all. Modern Androids are quite a bit better than they used to be. Even the most inexpensive phone or tablet you can buy in 2016 will do more and perform better that the best Android phone available just a few years ago. But many of us still want to root our phones and are looking for more information.

Table of contents


What exactly is root?

 When you root your Android, you're simply adding a standard Linux function that was removed.

Root, at least the way we're talking about it here, is the superuser. Your Android phone uses Linux permissions and file-system ownership. You are a user when you sign in, and you are allowed to do certain things based on your user permissions. Apps you install are also given a type of user ID, and they all have permissions to do certain things — you see those when you install them on older versions of Android, or you are prompted to allow them on Marshmallow or higher — in certain folders with certain files. Root is also a user. The difference is the root user (superuser) has permissions to do anything to any file any place in the system. This includes things we want to do, like uninstall application forced on us by the people who built them or the people who sells them to us as well as things we don't want to do that can put your Android in an unusable state. When you're doing things with superuser permissions, you have the power to do anything.

When you root your Android, you're simply adding a standard Linux function that was removed. A small file called su is placed in the system and given permissions so that another user can run it. It stands for Switch User, and if you run the file without any other parameters it switches your credentials and permissions from a normal user to that of the superuser. You are then in complete control, and can add anything, remove anything and access functions on your phone or tablet that you couldn't reach before. This is pretty important, and something you should think about before you begin.

Should I root my Android?


Yes. No. Maybe. All three answers are perfectly valid. People have different reasons to want to root their devices. Some do it just because they can — they paid for the hardware and think they should be able to do anything they like. Others want to be able to add things that aren't there, like internet servers or be able to "fix" services that are there but don't work the way they would like them to work. People might buy a phone because they like the hardware, but hate the software and want to change it. Mostly, people root their phones because they simply want to get rid of the extra things on it that they don't want. Every one of these reasons — as well as any reason you might have that aren't mentioned here — are the right reasons.
  
# Most people want root to get rid of the bloat.

Before you do any preparation to root your phone, you need to remember that it changes everything about the inherent security from Google and the people who built it. Plenty of us don't like it, but being able to access an account with admin permissions was not included in release versions of Android on purpose. As soon as you add this capability, you are responsible for the security and integrity of the operating system and every application on it. For some, this is more responsibility than they want or need. Rooting isn't the answer for everyone. If you're not sure about the ways you can break things by doing them as root, you should learn more about it before you start. It's OK to not know things and to try and learn, but not knowing and doing them anyway can turn a very expensive Android into a paperweight. You also need to know that for many Android models, rooting means your warranty is null and void. Services (including apps as well as network access from your carrier) can be denied to you because of the security risk when you're rooted. The risk is real, because so many users go into it all blind and let security lapse. Not doing that is your responsibility — take it seriously!

Finally, there are plenty of users who simply don't care about this stuff. Any Android phone, no matter how restricted root access is, can do just about everything we want or need from a pocket computer. You can change the appearance, choose from over a million apps in Google Play and have complete access to the internet and most any services that live there. You can even make phone calls. It's great if you're happy with what you have and what it can do, and aren't worried about trying to fix what isn't (in your eyes) broken.

Getting ready to root


You'll need to do a few things to prepare your phone for rooting, depending on which method you use. Many of the ways require you install the Android SDK or unlock your bootloader. This sounds like a lot of scary work, but it's not difficult and knowing how to use these tools will help if things go wrong.

Depending on which phone you have, unlocking the bootloader is slightly different. The "standard" way is by using the OEM unlock command, which is outlined here. If you're using a Motorola, HTC or LG phone (as well as other brands like Huawei or Sony) you'll likely need to get a token you enter during the process. You'll find how to do that and who to get it from at each vendors developer pages. Remember that unlocking the bootloader on your Android may affect the warranty status.

  Using commercial root apps

Using commercial rooting apps like Kingo Root or towelroot is straightforward, and can be done with or without a computer. While these apps can't root every phone, the people who make them are doing as best they can to keep the applications current.

While we can't validate the theories that these applications could potentially contain malware or send your data off to a server in some unfriendly nation, plenty of folks around the web have expressed concerns and doubts. You shouldn't ignore them. We recommend that you factory reset your Android before you download, install or run these applications to be safe. Your phone will remain rooted afterwards, and you can factory reset once again then sign in normally. Better safe than sorry.

Using Kingo Root

You can use Kingo Root with or without a computer. You'll find the download for both methods at the Kingo Root page — just select the one you want to use.


If you're using a windows computer with Kingo Root, you'll need to have the correct USB drivers installed on the computer you're using. If you don't have these, the Kingo Root program will try to locate and install the correct ones during the process. Simply plug your phone into the computer and start the application. It's as simple as letting the software set things up, then you click the button labeled "root" in the software. As long as your phone is supported, the rest is automatic. You'll see a list of recommended root application to install after the procedure is finished, but if the program say it was successful your phone should have the superuser unlocked .

Kingo Root Apk

It's easier to try and use the Kingo Root app on your phone to root. After you've downloaded it (and allowed sideloading of apps) you charge your phone to at least 50% and run the app. There's only one button to press, and after you tap it the rest is automatic. If the stand-alone version isn't successful, the computer version might be. Full instructions and tutorials for supported phones can be found at the Kingo Root support page.


It's easier to try and use the Kingo Root app on your phone to root. After you've downloaded it (and allowed sideloading of apps) you charge your phone to at least 50% and run the app. There's only one button to press, and after you tap it the rest is automatic. If the stand-alone version isn't successful, the computer version might be.Full instructions and tutorials for supported phones can be found at the Kingo Root support page.

Using towelroot

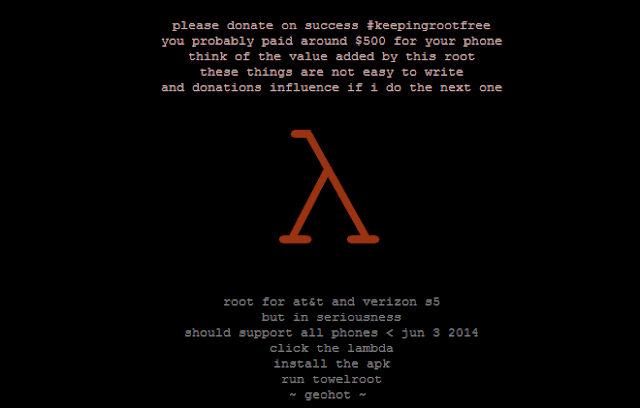
Towelroot is a popular rooting app written by Geohot, the well-known iPhone hacker. Using it is really easy:
  • Download the towelroot application from the official site
  • Install the app (after you allow sideloading) and run it by tapping the Lambda (the Greek letter) symbol in the middle of the app window
Towelroot will attempt to exploit the running kernel, giving temporary access to the system files. Once that happens, the correct files needed to run as root are pushed to the file system. A quick reboot later, and you're rooted.
Only install towelroot from the official towelroot page. There are plenty of mirrors and variants out there, but it's always safest to get files like this directly from the source.

How to root my phone?


How you root your Android is going to depend on which one you have. There are over 12,000 different Android models (and that's only counting ones that can access Google Play) from hundreds of different manufacturers. Some of those are easy to root, while some of them aren't. There are even models that will probably never be able to be rooted because the people who make or sell them just don't want you to be able to do it. And that's OK! Android means choice, and every person who wants a security-focused device that won't likely ever be rooted like the BlackBerry Priv should be able to buy one. And people who want a device that's easy to root (with all the tools and files needed to unlock it provided by the manufacturer) can buy one. This is something to keep in mind when you're buying your next phone and you should support the manufacturer who shares your thoughts about rooting. With over 12,000 different models, we can't cover every single method to root every single device. We can point you in the right direction and help you get there, though.

Rooting your Samsung phone


Samsung used to offer "developer editions" of their popular models, but weak sales (they usually needed to be paid for in full with no type of subsidy or financing) they seem to have stopped production. We have only ourselves to blame — it's just not worth making something that nobody is buying.
Samsung also makes very lucrative deals with carriers, and most of the time those carriers want to prevent you from rooting your phone. Recent models from AT&T or Verizon are notoriously difficult to exploit, and all the U.S. versions of the Galaxy S7 are locked up and encrypted. There might not ever be a way to root them. This isn't true for unlocked models sold outside of North America though.
  
Knox can pose special problems when trying to root. 


To root most Samsung phones you'll need to use a program called Odin. It's a low-level firmware flashing tool that can push image files to the storage and overwrite existing images. You'll also need the correct USB drivers for Windows computers. If you're using a Mac computer or running Linux, the software that flashes images is called Heimdall. They both work essentially the same, and carry the same risks — if you try and flash the wrong image or a bad image, your phone isn't going to be able to start. While this is often recoverable, know that there is always a chance you can ruin your phone or tablet, and your warranty is voided as soon as you begin.
Also, many Samsung phones ship with Knox security enabled. Knox is part of Samsung's special "Samsung Approved For Enterprise" feature where personal and work environments can be separated in a way that allows both to coexist on the same device. Knox can pose special problems when trying to root a phone that uses it, and it has a software counter that can show when device firmware has been tampered with. This means it's very easy for Samsung to void your warranty if you start fiddling with things.

Rooting your LG phone


LG phones have several different methods to install the files needed for rooting. Some are completely bootloader unlockable and it's trivial to push the files through a custom recovery, while some are locked up tighter and require some special tricks. As we see with Samsung phones, carriers have a lot of influence here, so many AT&T and LG models take longer to find a method to root.

The LG G5 is simple to root, and you can do it without a computer with both commercially available rooting apps as well as apps from Android enthusiasts like yourself. There are security questions any time you use software built by someone else that could potentially have full access to all the data on your phone or your computer, and you'll need to read everything you can and decide if you want to go this route. Apps like OneClickRoot or AndroidRootPro are a few examples. 

There are plenty of satisfied users as well as users who question the methods. Listen to both sides and decide what you think here. An alternative is unlocking your bootloader and installing an open-source custom recovery that you can use to flash the needed files or even pre-rooted firmware. This requires a little bit of computer knowledge, but it's not that difficult.

Rooting your HTC phone


Much like LG phones, many HTC models can be bootloader unlocked through the HTC Developer program. You'll find complete instructions for doing it here, as well as warranty information you need to know if you give it a try.

The HTC 10 is easy to root, and using the HTC Developer tools to unlock the bootloader allow for sending images to the phone to enable rooting and even more. There are also commercial services like Sunshine that can root your phone through an app or provide mail-in services where they do it for you. Again, it's up to you to decide if you feel comfortable with these services or if you would rather use the Android SDK and do things the manual way. Both methods are known to get you rooted and ready to do the things you wanted root to do.

Rooting your Lenovo (Motorola) phone


Motorola also offers a pretty liberal bootloader unlocking policy, which you'll find at their developer site. Using the standard Android SDK tools, you can unlock your bootloader so that a custom recovery image can be flash. This allows you to flash any other system image to your phone.

If your Motorola phone isn't covered under their bootloader unlocking policy (see the list here) — this means Verizon, of course — you might have to resort to exploits or commercial software like MOFOROOT or OneClickRoot. Once again, we have to remind you about using tools created by someone else that may have admin access on your phone or your computer, but the option is available.
We're waiting to see if the coming generation from Motorola is as developer friendly as they have been in the past, and we'll update accordingly.

Rooting your Nexus phone

To root your Nexus phone, you should start with learning how to install and configure the Android SDK. There are plenty of one-click scripts or toolboxes that will unlock your bootloader and get you ready to flash (or even flash it for you) a custom recovery, but there's a great reason to learn how to do it yourself — you are able to fix most anything if it goes wrong by using the Nexus FactoryImages.

Google not only supports unlocking your bootloader, they also give you full and complete instructions on how to do it, how to flash third-party images and how to go back. Unlocking the bootloader doesn't break any warranties as Google realizes that there are many valid reasons to flash experimental on the developer/reference device for Android. Take advantage of this, and use the tools Google provides!
Once a third-party recovery image is flashed, you're easily able to push anything you need for root or any other image to your Nexus. Because it's the reference phone and easy to alter, you'll find plenty of tools and resources for things you can do after you've rooted. We highly recommend a Nexus phone to anyone who wants to tinker with the Android software platform.

Other phones

As mentioned previously, there are over 12,000 current Android models from hundreds of manufacturers. There's no way to include each and every one on a single page.
Some of these phones come with a method (either apporved by the manufacturer or found by a third-party) to unlock the bootloader and use the custom recovery method to root them. Many of these other phones can be rooted with applications like Kingo Root, with or without access to a computer. Phones from names you know, like Sony or Hauwei, are supported as well as phones from companies you might not have heard of like Vivo or Phicomm. You'll find a partial list of supported phones here. 

Commercial root apps work, but check out the pros and cons before you use them.

 Apps like Kingo Root work because they take advantage of an exploit (a bug or glitch) in the software. This means that many security applications will identify them as a virus, and that software updates can (and do) break compatibility with them. Not every phone can be rooted through an app that leverage an exploit, but many can. It's certainly worth a look to see if your particular phone is supported. These services are profitable, and profitability means time and money is spent to keep them current and working on as many models as possible.

 By Jerry Hildenbrand


Read More »

How To Install Windows On Your Apple Mac When All Other MethodsFails


What won’t work

During the course of my Windows install venture I figured out at least 6 ways which didn’t work. They all have their eureka moments, but don’t work out in the end.


1. Cleaning the superdrive

Apparently you can drape something like a lens cleaner over a thin business card, stick the thing into the slot and get to work on it. The business end of the drive is at the bottom so if you wiggle it just right, and you’re lucky, you could be successful in cleaning the thing. You can also try blowing some compressed air into it.

If you were successful in doing so you can basically skip this guide and install via Basecamp, well done!
 
2. Bootable USB via bootcamp

The only snag with this was that I didn’t have this option. Apparently this is only available for computers without an optical drive. There is a way in which you can enable this pretty easily though. This is something we will need to do further on as a part of our installation, but it still doesn’t work on its own.

When I saw the option, I promptly clicked on it and let Bootcamp create a startup USB for me. It worked at first, but then refused to even acknowledge it in the boot menu. I tried this with and without Bootcamp drivers and I even tried checking the "Install Windows" options which would automatically start the process for me.

I was a bit downcast but I thought: hey, let’s create a bootable USB in Windows! I found a Windows laptop and created an USB using Rufus. Of course, it didn’t work, it wasn’t seen by the boot manager. I went back and used the Windows 7 USB/DVD Download Tool which was made by Microsoft. Still nothing. Changed another pen drive. Nope. Sigh.

3. Firmware update

Good news, my iMac model has a firmware update, and what’s more, this update has to do with "booting" stuff (is luck finally on my side?). I downloaded and installed the firmware update and after a terrifying BIOS beep, everything was back to the good old not working ways.

Oh well, at least my firmware is updated.

4. rEFInd Boot Manager

After reading a whole lot of forums I saw that using rEFInd, an alternative boot loader may help.

Once installed and loaded on startup it "saw" the USB, however, while it was able to access the drive, I always receive a "No bootable disk found" message. This was weird since the message obviously came from the boot device, why is it looking for (maybe) a CD? Try as I may, rEFInd was not the answer, although just like Bootcamp, it is a part of the final solution.
 
5. Using an external drive

Nope. This was the second thing I tried but it didn’t even see the CD. Once I had rEFInd installed I tried again; the CD showed up in the boot manager, but it refused to boot from it. All I got was a horizontal cursor and nothing more. One thing I didn’t try was an Apple-made external drive but while it’s possible that (for some unknown reason) this would work, I have read that it doesn’t.

6. Virtual machines

I remember from using Parallels that it can use a Bootcamp partition, allowing me to use the bootable partition as a virtual machine. I had a feeling this wouldn’t work, but it was worth a shot. Parallels (and other virtualization apps) can’t install Windows as boot partitions. They can use them once created, but only if created separately.

Again, virtual machines will be a part of our solution, but not THE solution.
What does work

Technically, it is a specific series of operations that works. My source for it is Yes, This Big – a huge thank you to them for figuring out the final solution.

Here is the simplified rundown of the solution:

    Force Bootcamp to create a bootable disk
    Create a custom virtual machine with VMware (the trial version is sufficient)
    Modify the virtual machine and install Windows onto the Bootcamp partition
    Delete all the files and copy them, from the USB key
    Boot into the Bootcamp partition using rEFInd and Install Windows normally
    Curse Apple a little bit for making this so difficult

Let’s take a look at the specifics of all these steps, by the end of which you will have a nice little Windows install!
 
1. Force Bootcamp to create a bootable disk

If you don’t have this option enabled, you’ll need to edit some files.

You’ll need your computer’s (1) Boot ROM version and (2) Model Identifier which can be found in System Report. (Open up Spotlight, with Cmd + Space, and type "System Information".)

Here’s a sample of what you will see:


Head on over to the Applications/Utilities folder, right-click "Boot Camp Assistant.app" and choose "Show Package Contents".

Go into the "Contents" folder and make a copy of "info.plist" somewhere, just in case. Next, open the original "info.plist" file in a text editor, and search for "USBBootSupportedModels" – it should be somewhere at the bottom.

Look up your model identifier and add it as a string, something like this

   
<key>USBBootSupportedModels</key>
<array>
 <string>Your Model Identifier</string>
 <string>MacBook7,1</string>
 <string>MacBookAir3,2</string>
 <string>MacBookPro8,3</string>
 <string>MacPro5,1</string>
 <string>Macmini4,1</string>
</array>

Next, find the section labeled "DARequiredROMVersions" and add your Boot ROM Version in a similar fashion:

   
<key>DARequiredROMVersions</key>
<array>
 <string>Your Boot ROM Version</string>
 <string>IM41.0055.B08</string>
 <string>IM42.0071.B03</string>
 <string>IM51.0090.B03</string>
 <string>IM52.0090.B03</string>
 <string>IM61.0093.B01</string>
 <string>MP11.005C.B04</string>
 <string>MB11.0061.B03</string>
 <string>MBP11.0055.B08</string>
 <string>MBP12.0061.B03</string>
 <string>MM11.0055.B08</string>
</array>

You can now save and close this file.

Open Bootcamp and wonder at the appearance of the "Create a Windows 7 or later version install disk". Click all the checkboxes and let Bootcamp do its thing. You’ll need to supply it with an ISO image which you can generate with Rufus or the Windows 7 USB/DVD Download Tool.

Once Bootcamp is done, it won’t be able to install Windows. When it reboots, press the alt button until the boot manager comes up and boot back into OS X.

2. Create a custom virtual machine with VMware

Note: I’m pretty sure this can be done with other virtualization software as well but I don’t know enough about this topic to go rogue. The trial version of VMware is more than enough for this task so you can get it done free either way.

Before we jump in, we’ll need to take a look at the disk identifier of our Bootcamp partition.

Using Spotlight to type "Disk Utility", click on the BOOTCAMP partition and press CMD + i. This will bring up a disk info window where you can find the Disk Identifier – make a note of it


Open VMware fusion and press CMD + N to create a new virtual machine. You’ll need to click "More options…" and select "Create a custom virtual machine". Then click Continue.


Now, select the operating system you are installing, click Continue and select "Create a new virtual disk" from the next menu. Click Continue and select "Customize Settings" from the bottom of the next screen; this will let you specify the location for the virtual machine. I selected my desktop for easy access – you can safely delete it once this is all over anyway. Finish up and close VMware.

3. Modify the virtual machine and install Windows onto the Bootcamp partition

Now, we’ll use some trickery to make VMware use our Bootcamp partition as the target location for the install.

To edit the settings for the virtual machine you’ll need to open up a terminal. Once ready, type "cd " (add a space at the end) and drag the icon of your virtual machine into the terminal and press Enter.

Now you’ll need to issue a command which will link the VM to Bootcamp, take care to replace [X] and [Y] with the correct values.

1     /Applications/VMware\ Fusion.app/Contents/Library/vmware-rawdiskCreator create /dev/disk[X] [Y] win7_raw lsilogic

In the screenshot of my BOOTCAMP partition the disk identifier was disk0s4. The first number (0) would be X and the second (4) would be Y.

So in my case the command would be:
    
1    /Applications/VMware\ Fusion.app/Contents/Library/vmware-rawdiskCreator create /dev/disk0 4 win7_raw lsilogic

You won’t see any feedback from the terminal but if it worked, you should see a new file within the VM file.

Click on the icon for your virtual machine on the Desktop and click "Show Package Contents". This should result in a list of files – the new file you should be looking for
 "win7_raw.vmdk". 
 
The next step is to edit the "Windows 7 x64.vmx" file.

Open it in your text editor and search for the line starting with "scsi0.virtualDev" and edit its value to "lsilogic". Then search for "scsi0:0.fileName" and edit its value to "win7_raw.vmdk".


Open VMware and start the virtual machine. It will ask for your password because it needs to access the Bootcamp partition. You’ll need to install Windows from the iso file you created earlier. You may need to press CMD + A to open the settings and go to the CD/DVD section. Click Autodetect and choose the iso image and click enable.

Let the installer do its thing. You’ll need to format the Bootcamp partition using the drive tools because it won’t install on a FAT32 partition. Other than that, all should be well.
4. Delete all the files and copy them from the USB key

When the installation is complete, stop VMware and delete all files from Bootcamp.

OS X will still not be able to boot from the Bootcamp partition so we’ll delete everything we’ve done, and copy the files from our USB device (I’m not quite sure what’s happening here, I suspect that we are essentially using VMware to make the drive bootable, but we need a proper bootsector from our USB drive).

In any case, you may run into some problems while deleting because OS X may refuse to write the files on your NTFS drive. I used the Tuxera trial version to get this done (worked like a charm).

Now, copy all files from your USB key onto the Bootcamp partition.

5. Boot into the Bootcamp partition using rEFInd & install Windows normally

The last step is installing rEFInd. This is usually a simple matter of running a shell script, but with Yosemite, this has been complicated a bit.

Go to the download page and download the first option, the binary zip file and unzip it.

Open the terminal, type "cd ", drag the unzipped folder (it’s something like "refind-bin-0.8.3") into it and press enter. Type the following command:


1    sudo bash install.sh –esp

If you’re on Mavericks or earlier this should suffice, but if you’re on Yosemite, you’ll need to do some extra work. Yosemite users should go to "/Volumes/esp/EFI/refind/" and open the "refind.conf" file in their text editor. Find the line that has "dont_scan_volumes" in it. By default this line should be commented out, indicated by a hash sign at the beginning.

Uncomment the line and add two dummy values to it, mine looks like this:

1         dont_scan_volumes foo,bar

Once this has been done, reboot your Mac – it should use the new boot manager automatically. If it doesn’t reboot, hold down alt and select the "EFI Boot" option in the default boot manager.

Once in, select the Bootcamp partition and install Windows as usual. Once done it is a good idea to install the Bootcamp drivers. You can grab them from Apple and install them through your brand-spanking new Windows.

6. Curse Apple a little bit for making this so difficult

Seriously, Apple? There is no need for such complexity here.

First of all, if Macs do offer the opportunity of installing Windows in the first place, and the option to do it via a bootable USB that’s already built in, why hide this from some users just because they have a disk drive? Also, I’m pretty sure that the default boot manager not seeing boot devices is an artificial limitation, it has nothing to do with the Mac not supporting things.

But in any case, hopefully this article has helped some of you who were struggling with installing Windows on your Macs. I can finally play my Windows games from Steam which was kind of the goal of this whole enterprise in the first place!

   
Read More »

Toyota Hydrogen Buses 100% Fuel Cell Can Work As Emergency Generators

It's preparing a 100-strong fleet ahead of the 2020 Tokyo games.

Toyota will start selling fuel cell (FC) buses in 2017, with the aim of selling up to 100 in the Tokyo area ahead of the 2020 Olympic games. The company is using a beefed up version of the fuel system it developed for the Toyota Murai, with 10 high pressure tanks holding 600 liters of highly compressed H2. That gives it 235 kWh or power, about three times that of a Tesla Model S, meaning it "can be

used as a power source in the event of disasters," the company said in a press release.
Toyota has been working on CO2-free fuel-cell buses for a while now with its Hino bus and truck division. The company is bullish on hydrogen fuel cell vehicles, even though they're less efficient than EVs if the hydrogen is generated using water and electricity. Hydrogen made by reforming methane creates CO2 pollution, though less overall than if gasoline- or diesel-powered vehicles are used. That's assuming the methane, a potent greenhouse gas, doesn't leak -- and it often does.

JAPAN-TOSHIBA/
Toru Hanai/Reuters
Toshiba recently unveiled Japan's largest water electrolysis hydrogen production plant (above) that uses power from the electrical grid. Unfortunately the nation still gets most of its electricity from fossil fuels, not renewable or nuclear energy. And the bulk of hydrogen is still produced by methane reforming, a polluting process made worse by the fact that Japan imports its methane.

However, the nation plans to produce more hydrogen by electrolysis over the next decade as part of Prime Minister Shinzo Abe's push to a hydrogen future. For more on fuel cells and hydrogen vehicles, check Engadget's explainer.


Source: Toyota


Read More »

Twitter, Spotify and Reddit, and a Huge Number of Other Big Website Reportedely Down This Morning

This Is Why Half the Internet Shut Down Today

Twitter, Spotify and Reddit, and a huge swath of other websites were down or screwed up this morning. This was happening as hackers unleashed a large distributed denial of service (DDoS) attack on the servers of Dyn, a major DNS host. It’s probably safe to assume that the two situations are related.

Update 4:22 PM EST: Looks like this is probably going to get even worse before it gets any better. Dyn says they are being hit with a third wave of attacks. Dyn told CNBC the attack is “well planned and executed, coming from tens of millions IP addresses at same time.”

Update 12:28 PM EST: Dyn says it is investigating yet another attack, causing the same massive outages experienced this morning. Based on emails from Gizmodo readers, this new wave of attacks seems to be affecting the West Coast of the United States and Europe. It’s so far unclear how the two attacks are related, but the outages are very similar.

In order to understand how one DDoS attack could take out so many websites, you have to understand how Domain Name Servers (DNS) work. Basically, they act as the Internet’s phone book and facilitate your request to go to a certain webpage and make sure you are taken to the right place. If the DNS provider that handles requests for Twitter is down, well, good luck getting to Twitter. Some websites are coming back for some users, but it doesn’t look like the problem is fully resolved.

Dyn posted this update on its website: “Starting at 11:10 UTC on October 21th-Friday 2016 we began monitoring and mitigating a DDoS attack against our Dyn Managed DNS infrastructure. Some customers may experience increased DNS query latency and delayed zone propagation during this time. Updates will be posted as information becomes available.”

Here’s a list of websites that readers have told us they are having trouble accessing:
  • ActBlue
  • Basecamp
  • Big cartel
  • Box
  • Business Insider
  • CNN
  • Cleveland.com
  • Etsy
  • Github
  • Grubhub
  • Guardian.co.uk
  • HBO Now
  • Iheart.com (iHeartRadio)
  • Imgur
  • Intercom
  • Intercom.com
  • Okta
  • PayPal
  • People.com
  • Pinterest
  • Playstation Network
  • Recode
  • Reddit
  • Seamless
  • Spotify
  • Squarespace Customer Sites
  • Starbucks rewards/gift cards
  • Storify.com
  • The Verge
  • Twillo
  • Twitter
  • Urbandictionary.com (lol)
  • Weebly
  • Wired.com
  • Wix Customer Sites
  • Yammer
  • Yelp
  • Zendesk.com
  • Zoho CRM
  • Credit Karma
  • Eventbrite
  • Netflix
  • NHL.com
  • Fox News
  • Disqus
  • Shopify
  • Soundcloud
  • Atom.io
  • Ancersty.com
  • ConstantContact
  • Indeed.com
  • New York Times
  • Weather.com
  • WSJ.com
  • time.com
  • xbox.com
  • dailynews.com
  • Wikia
  • donorschoose.org
  • Wufoo.com
  • Genonebiology.com
  • BBC
  • Elder Scrolls Online
  • Eve Online
  • PagerDuty
  • Kayak
  • youneedabudget.com
  • Speed Test
  • Freshbooks
  • Braintree
  • Blue Host
  • Qualtrics
  • SBNation
  • Salsify.com
  • Zillow.com
  • nimbleschedule.com
  • Vox.com
  • Livestream.com
  • IndieGoGo
  • Fortune
  • CNBC.com
  • FT.com
  • Survey Monkey
  • Paragon Game
  • Runescape


Here’s an internet outage map from DownDetector as of 12:46 PM EST:


Here’s an internet outage map from DownDetector as of 12:46 PM EST:


At the time of publication Dyn said that it was still dealing with the problem
.

Update 9:05 AM EST: Judging by emails from readers, this problem seems to be getting worse. 

 Update 9:43 AM EST: Dyn says the issue has been resolved.

Update 12:19 PM EST: Dyn says the issue is resolved, but multiple readers are messaging me to say they’re still having trouble accessing websites. 

Update 12:25pm EST: It’s happening again. (see above)


By: William Turton Staff Writer, Gizmodo  


Read More »